使用Python和Arduino在ESP32上预测正弦函数
引言
在嵌入式系统中,使用机器学习进行预测和推理的需求越来越普遍。在本文中,我们将介绍如何使用Python和Arduino配合,在ESP32开发板上预测正弦函数。我们将使用Python训练一个神经网络模型,并将其转换为TensorFlow Lite格式,然后将模型加载到ESP32上进行推理。
简介
本教程旨在帮助您了解如何使用Python和Arduino在ESP32上进行机器学习推理。我们将训练一个能够预测正弦函数的神经网络模型,并将其转换为TensorFlow Lite格式,然后使用Arduino加载模型,并在ESP32上进行预测。这对于嵌入式系统中的智能传感器、边缘计算等应用非常有用。
1. 训练模型
首先,我们需要编写Python代码来训练神经网络模型。在代码中,我们使用NumPy生成正弦函数的样本数据,并使用TensorFlow库构建和训练模型。
代码中需要用到tensorflow库,可通过以下命令安装
pip install tensorflow
python代码
import math
import numpy as np
import tensorflow as tf
from tensorflow.keras import layers


def get_model():
    SAMPLES = 1000
    np.random.seed(1337)
    x_values = np.random.uniform(low=0, high=2*math.pi, size=SAMPLES)
    # shuffle and add noise
    np.random.shuffle(x_values)
    y_values = np.sin(x_values)
    y_values += 0.1 * np.random.randn(*y_values.shape)

    # split into train, validation, test
    TRAIN_SPLIT = int(0.6 * SAMPLES)
    TEST_SPLIT = int(0.2 * SAMPLES + TRAIN_SPLIT)
    x_train, x_test, x_validate = np.split(x_values, [TRAIN_SPLIT, TEST_SPLIT])
    y_train, y_test, y_validate = np.split(y_values, [TRAIN_SPLIT, TEST_SPLIT])

    # create a NN with 2 layers of 16 neurons
    model = tf.keras.Sequential()
    model.add(layers.Dense(16, activation='relu', input_shape=(1,)))
    model.add(layers.Dense(16, activation='relu'))
    model.add(layers.Dense(1))
    model.compile(optimizer='rmsprop', loss='mse', metrics=['mae'])
    model.fit(x_train, y_train, epochs=200, batch_size=16,
              validation_data=(x_validate, y_validate))
    return model


model = get_model()
converter = tf.lite.TFLiteConverter.from_keras_model(model)
converter.optimizations = [tf.lite.Optimize.OPTIMIZE_FOR_SIZE]
tflite_model = converter.convert()

# Save the model to disk
open("sine_model.tflite", "wb").write(tflite_model)
运行代码后,会在当前目录生成一个名为sine_model.tflite的模型文件
代码解释
代码的功能是创建一个用于预测正弦函数的神经网络模型,并将该模型转换为TensorFlow Lite格式并保存到磁盘上。
下面是代码的详细解释:
- 导入必要的库:
import math
import numpy as np
import tensorflow as tf
from tensorflow.keras import layers
- 定义一个函数
get_model(),用于创建和训练神经网络模型,并返回该模型:
def get_model():
- 设置样本数量和随机种子:
    SAMPLES = 1000
    np.random.seed(1337)
- 生成x值,并进行洗牌和添加噪声:
    x_values = np.random.uniform(low=0, high=2*math.pi, size=SAMPLES)
    np.random.shuffle(x_values)
- 生成对应的y值(正弦函数的值)并添加噪声:
    y_values = np.sin(x_values)
    y_values += 0.1 * np.random.randn(*y_values.shape)
- 将数据分割为训练集、验证集和测试集:
    TRAIN_SPLIT = int(0.6 * SAMPLES)
    TEST_SPLIT = int(0.2 * SAMPLES + TRAIN_SPLIT)
    x_train, x_test, x_validate = np.split(x_values, [TRAIN_SPLIT, TEST_SPLIT])
    y_train, y_test, y_validate = np.split(y_values, [TRAIN_SPLIT, TEST_SPLIT])
- 创建一个包含两个具有16个神经元的隐藏层的神经网络模型:
    model = tf.keras.Sequential()
    model.add(layers.Dense(16, activation='relu', input_shape=(1,)))
    model.add(layers.Dense(16, activation='relu'))
    model.add(layers.Dense(1))
- 编译模型,指定优化器、损失函数和评估指标:
model.compile(optimizer='rmsprop', loss='mse', metrics=['mae'])
- 使用训练集数据训练模型:
model.fit(x_train, y_train, epochs=200, batch_size=16, validation_data=(x_validate, y_validate))
- 返回训练好的模型:
return model
- 调用
get_model()函数获取训练好的模型:
model = get_model()
- 创建一个TFLite转换器并将模型转换为TensorFlow Lite格式:
converter = tf.lite.TFLiteConverter.from_keras_model(model)
converter.optimizations = [tf.lite.Optimize.OPTIMIZE_FOR_SIZE]
tflite_model = converter.convert()
- 将转换后的模型保存到本地:
open("sine_model.tflite", "wb").write(tflite_model)
总结来说,这段代码的作用是创建一个用于预测正弦函数的神经网络模型,通过训练模型来拟合正弦函数的数据,并将训练好的模型转换为TensorFlow Lite格式并保存到磁盘上,以便在资源受限的设备上进行部署和推理。
2. 转换模型
在将模型转换为TensorFlow Lite格式后,我们可以使用xxd命令将.tflite文件转换为C矩阵头文件。这样做的好处是,我们可以将模型以C数组的形式嵌入到Arduino代码中,方便加载和使用。
请按照以下步骤执行转换:
- 打开终端或命令提示符,并导航到存储
sine_model.tflite文件的目录。 - 运行以下命令将模型转换为C矩阵头文件:
xxd -i sine_model.tflite > sine_model.h
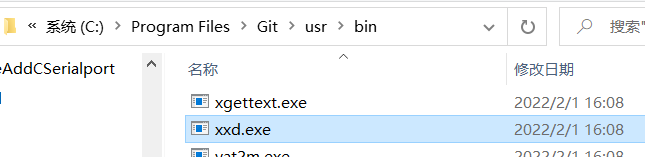
xxd是一个Linux命令,Windows安装了git就有,可使用everything自行搜索
xxd.exe,将其所在目录添加到环境变量中即可使用xxd命令。
- 这将生成一个名为
sine_model.h的文件,其中包含模型的C数组表示形式。 - 将生成的sine_model.h文件复制到Arduino项目的目录中。
3. 使用模型
现在,我们将转向Arduino部分,将训练好的模型加载到ESP32上,并进行正弦函数的预测。
环境
示例程序具体分以下几个步骤:
-
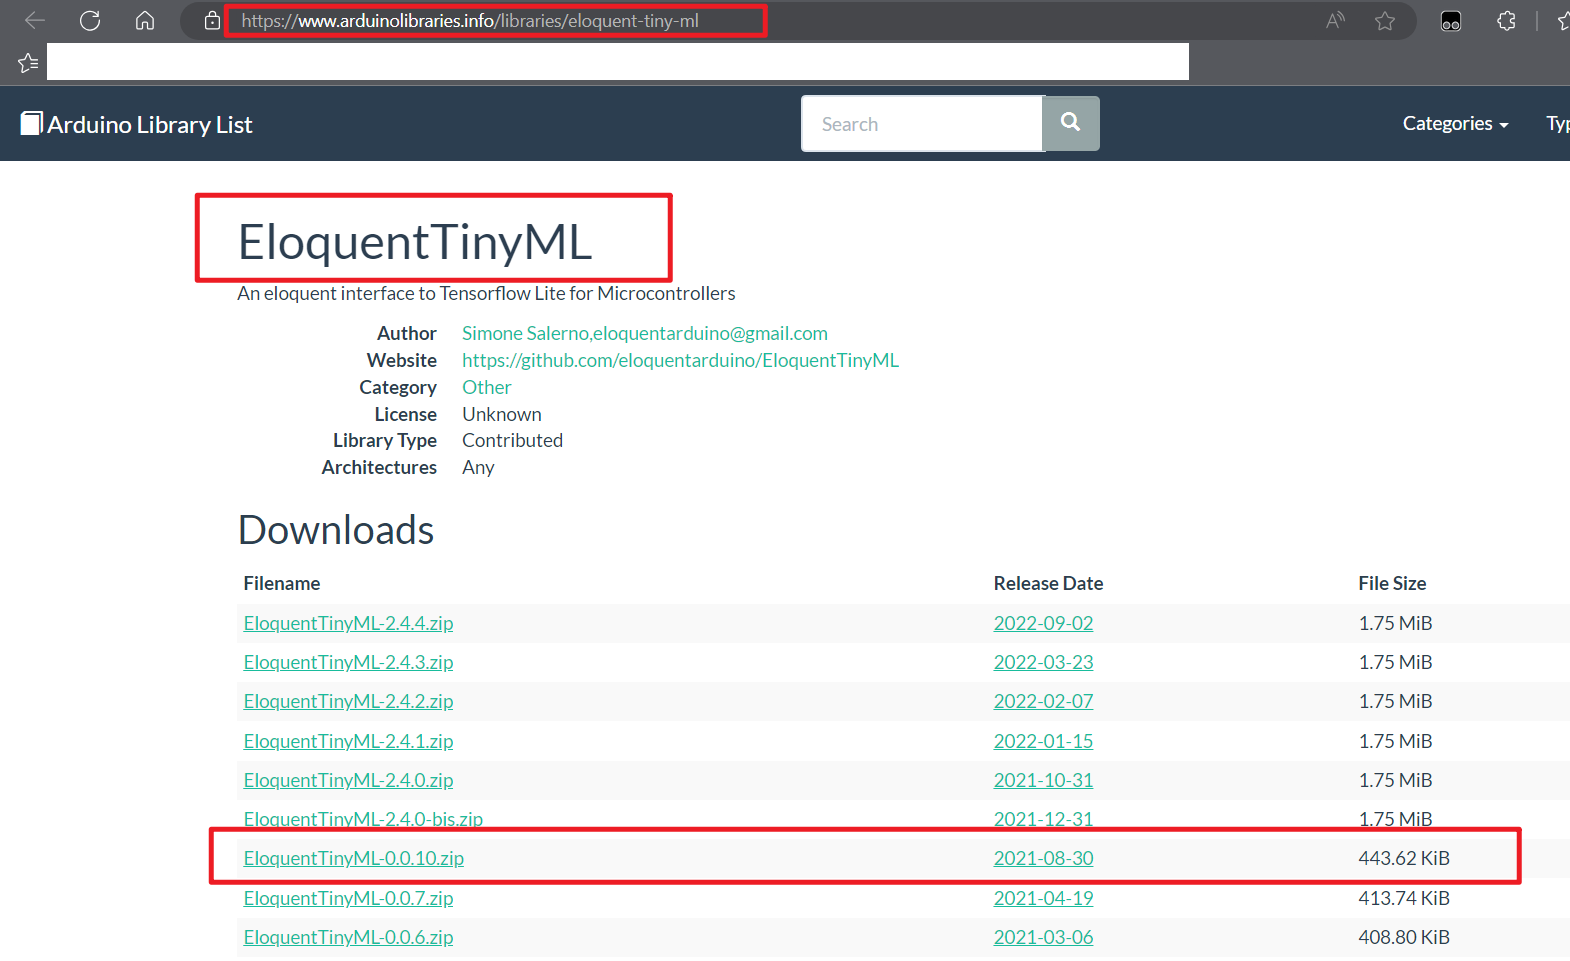
引入库和头文件 在Arduino IDE中,我们需要引入
EloquentTinyML库和模型头文件。这些库提供了在ESP32上加载和运行TensorFlow Lite模型的功能。这里我是通过arduinolibraries网站检索并下载EloquentTinyML-0.0.10.zip
-
定义模型和参数 我们需要定义模型的输入和输出数量,以及Tensor Arena的大小。这些参数决定了模型的输入输出维度和所需的内存空间。
-
设置和初始化模型 在Arduino的
setup()函数中,我们初始化串口通信,并使用EloquentTinyML库的begin()函数加载模型。 -
循环预测 在
loop()函数中,我们使用随机生成的x值计算实际的正弦函数值,并使用模型预测对应的y值。我们将实际值和预测值通过串口打印出来,并延迟一段时间后重复这个过程。
示例esp32代码
#include <Arduino.h>

// https://github.com/eloquentarduino/EloquentTinyML  Version:0.0.10
#include <EloquentTinyML.h>
// sine_model.h contains the array you exported from the previous step with xxd or tinymlgen
#include "sine_model.h"

#define NUMBER_OF_INPUTS 1
#define NUMBER_OF_OUTPUTS 1
// in future projects you may need to tweek this value: it's a trial and error process
#define TENSOR_ARENA_SIZE 2 * 1024

Eloquent::TinyML::TfLite<NUMBER_OF_INPUTS, NUMBER_OF_OUTPUTS, TENSOR_ARENA_SIZE> ml;

void setup()
{
  Serial.begin(115200);
  ml.begin(sine_model_tflite);
}

void loop()
{
  // pick up a random x and predict its sine
  float x = 3.14 * random(100) / 100;
  float y = sin(x);
  float input[1] = {x};
  float predicted = ml.predict(input);

  Serial.print("sin(");
  Serial.print(x);
  Serial.print(") = ");
  Serial.print(y);
  Serial.print("\t predicted: ");
  Serial.println(predicted);
  delay(100);
}
代码解释
这段代码是ESP32的Arduino代码,用于加载和运行之前在Python中训练并转换为TensorFlow Lite格式的模型,以进行正弦函数预测。
以下是代码的详细解释:
- 引入必要的库和头文件:
#include <Arduino.h>
#include <EloquentTinyML.h>
#include "sine_model.h"
- 定义输入和输出的数量:
#define NUMBER_OF_INPUTS 1
#define NUMBER_OF_OUTPUTS 1
- 定义Tensor Arena的大小,用于分配内存空间给模型:
#define TENSOR_ARENA_SIZE 2 * 1024
- 创建TinyML对象并设置模型数据:
Eloquent::TinyML::TfLite<NUMBER_OF_INPUTS, NUMBER_OF_OUTPUTS, TENSOR_ARENA_SIZE> ml;
- 在
setup()函数中初始化串口通信和TinyML模型:
void setup()
{
  Serial.begin(115200);
  ml.begin(sine_model_tflite);
}
- 在
loop()函数中进行循环预测:
void loop()
{
  // 随机选择一个x值并预测其正弦值
  float x = 3.14 * random(100) / 100;
  float y = sin(x);
  float input[1] = {x};
  float predicted = ml.predict(input);

  Serial.print("sin(");
  Serial.print(x);
  Serial.print(") = ");
  Serial.print(y);
  Serial.print("\t predicted: ");
  Serial.println(predicted);
  delay(100);
}
在每次循环中,它会随机选择一个x值,计算该x值的正弦值,并将其作为实际值y进行打印。然后,它将x值作为输入传递给TinyML模型的predict()函数,并将预测值打印出来。之后,它会延迟100毫秒,然后重复这个过程。
通过这段代码,ESP32可以利用之前训练好的TensorFlow Lite模型来进行正弦函数的预测,并将实际值和预测值输出到串口供观察和调试。
示例效果
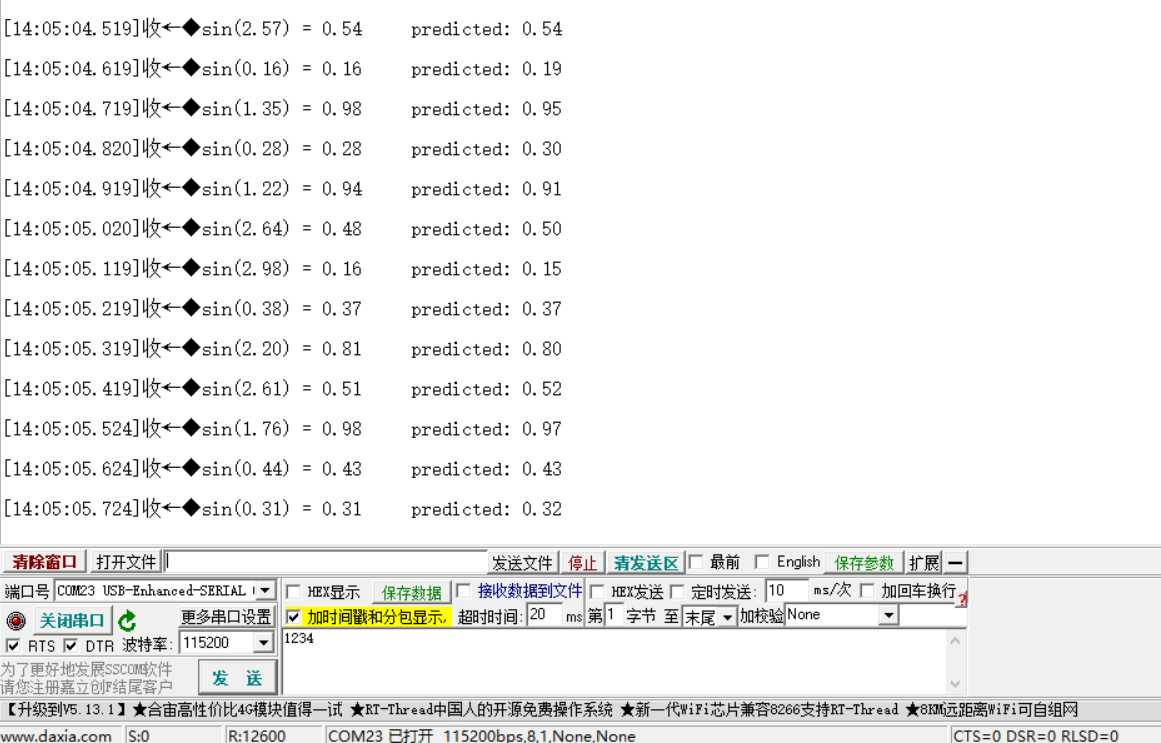
代码运行在合宙的esp32c3 ,可见预测结果在一定程度还是挺准的,以上就是使用Python和Arduino在ESP32上预测正弦函数的流程。