本文仅为深度学习的入门学习,故采用线性模型而非CNN处理图像数据集。
一、准备工作
1. 下载CIFAR-10数据集
这是一个\(32\times32\)像素的RGB图像集合,用于学习使用。
from torchvision import datasets
data_path = "./data/"
cifar10 = datasets.CIFAR10(root=data_path, train=True,
                           download=False)    # 下载训练集
cifar10_val = datasets.CIFAR10(
    root=data_path, train=False, download=False)   # 下载验证集
数据集共有10个类别,用一个整数对应10个级别中的一个:
class_names = {0: "飞机", 1: "汽车", 2: "鸟", 3: "猫",
               4: "鹿", 5: "狗", 6: "青蛙", 7: "马", 8: "船", 9: "卡车"}
查看数据集的父类,注意Dataset类,后面会提到!
type(cifar10).__mro__
(torchvision.datasets.cifar.CIFAR10,
 torchvision.datasets.vision.VisionDataset,
 torch.utils.data.dataset.Dataset,
 typing.Generic,
 object)
2. Dataset类
Dataset类中实现了2种函数的对象:__len__()和__getitem__(),前者返回数据项的总数,后者返回样本和与之对应的整数索引。
len(cifar10)
50000
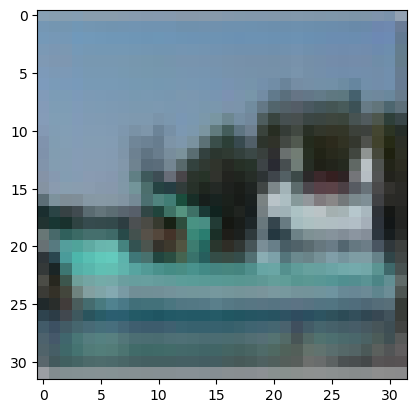
img, label = cifar10[111]
img, label, class_names[label]
(<PIL.Image.Image image mode=RGB size=32x32>, 8, '船')
import matplotlib.pyplot as plt
plt.imshow(img)
plt.show()
3. Dataset变换
在transform中提供了ToTensor对象,它将Numpy数组和PIL图像变换为张量。并将输出张量的尺寸设置为:\(C\times H\times W\)(分别代表通道、高度和宽度)
from torchvision import transforms
to_tensor = transforms.ToTensor()
img_t = to_tensor(img)
img_t.shape
torch.Size([3, 32, 32])
图像已经转变为 \(3\times 32\times 32\)的张量。但是,它的标签并不会改变。
回到第一步,在数据集加载时,可以将ToTensor()作为一个参数
tensor_cifar10 = datasets.CIFAR10(
    data_path, train=True, download=False, transform=transforms.ToTensor())
此时,访问数据集的元素将返回一个张量,而不是PIL图像
img_t, _ = tensor_cifar10[111]
type(img_t)
torch.Tensor
img_t.shape, img_t.dtype
(torch.Size([3, 32, 32]), torch.float32)
原始PIL图像,中的值0-255(每个通道8位),而ToTensor变换将数据变换为每个通道32位浮点数,将值缩小为0.0~1.0
img_t.min(), img_t.max()
(tensor(0.0588), tensor(0.8039))
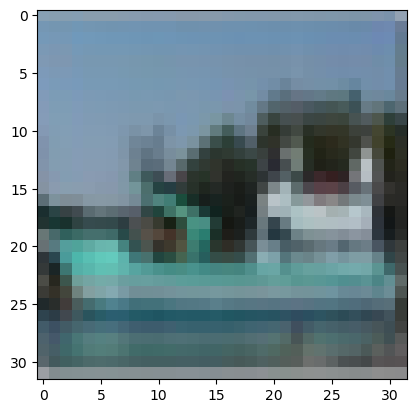
验证下图片是否一致,在这之前需要更改下通道以符合matplotlib的期望,将\(C\times H \times W\)改为\(H\times W \times C\)
plt.imshow(img_t.permute(1, 2, 0))
plt.show()
4. 数据归一化
由于CIFAR-10数据集较小,可将数据集返回的所有张量并沿着一个额外的维度进行堆叠
import torch
imgs = torch.stack([img_t for img_t, _ in tensor_cifar10], dim=3)
imgs.shape
torch.Size([3, 32, 32, 50000])
view(3, -1)保留了3个通道,并将剩余的维度合并为一个维度,从而计算适当的尺寸大小。这里\(3\times 32\times32\)图像被转换了\(3\times 1024\)的向量,然后对每个通道的1024个向量求平均值
imgs.view(3, -1).mean(dim=1)
tensor([0.4914, 0.4822, 0.4465])
同理,计算标准差
imgs.view(3, -1).std(dim=1)
tensor([0.2470, 0.2435, 0.2616])
现在可进行Normalize变换了
transforms.Normalize((0.4914, 0.4822, 0.4465), (0.2470, 0.2435, 0.2616))
Normalize(mean=(0.4914, 0.4822, 0.4465), std=(0.247, 0.2435, 0.2616))
再次更改第3步中的tensor_cifar10:
transformed_cifar10 = datasets.CIFAR10(
    data_path, train=True, download=False,
    transform=transforms.Compose([
        transforms.ToTensor(),
        transforms.Normalize((0.4914, 0.4822, 0.4465),
                             (0.2470, 0.2435, 0.2616))
    ])
)
重新调整下维度,显示图片
img_t, _ = transformed_cifar10[111]
plt.imshow(img_t.permute(1, 2, 0))
plt.show()
Clipping input data to the valid range for imshow with RGB data ([0..1] for floats or [0..255] for integers).

可见颜色与原来不同,这是因为归一化对RGB超出0.0-1.0的数据进行了转化,并调整了通道的总体大小,数据存在,但matplotlib渲染不同。
二、区分鸟与飞机
1. 构建数据集
label_map = {0: 0, 2: 1}
class_names = ['airplane', 'bird']
cifar2 = [(img, label_map[label]) for img, label in cifar10 if label in [0, 2]]

cifar2_val = [(img, label_map[label])
              for img, label in cifar10_val if label in [0, 2]]
构建一个线性模型
import torch.nn as nn

n_out = 2
model = nn.Sequential(
    nn.Linear(
        3072,   # 输入特征
        512,    # 隐藏层大小
    ),
    nn.Tanh(),
    nn.Linear(
        512,    # 隐藏层大小
        n_out,  # 输出类
    )
)
3. 用概率表示输出
softmax函数,获取一个向量并生成另一个相同维度的向量,表达式如下所示:
def softmax(x):
    return torch.exp(x) / torch.exp(x).sum()


x = torch.tensor([1.0, 2.0, 3.0])
softmax(x)
tensor([0.0900, 0.2447, 0.6652])
它满足概率的约束条件,即各个概率相加为1
softmax(x).sum()
tensor(1.)
当然,nn模块将Softmax作为一个可用模块。在使用时,要求指定用来编码概率的维度。
softmax = nn.Softmax(dim=1)
x = torch.tensor([[1., 2., 3.],
                 [1., 2., 3.]])
softmax(x)
tensor([[0.0900, 0.2447, 0.6652],
        [0.0900, 0.2447, 0.6652]])
在建立模型时,添加softmax函数,这样网络便可产生概率。
model = nn.Sequential(
    nn.Linear(3072, 512),
    nn.Tanh(),
    nn.Linear(512, 2),
    nn.Softmax(dim=1)
)
在正式训练模型前,尝试运行下,看看结果
img, _ = cifar2[0]
img_t = to_tensor(img)
plt.imshow(img_t.permute(1, 2, 0))
plt.show()
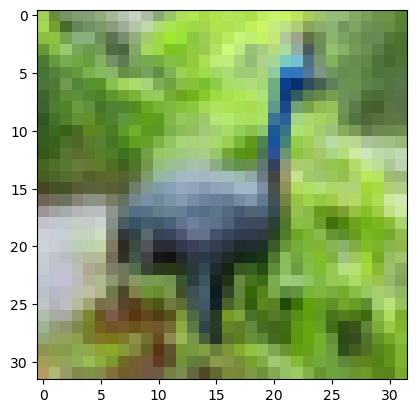
在使用模型时需要输入正确的维度。在输入中,期望是3072个特征,而nn处理的是沿着第0维成批组织的数据。因此我们需要将\(3\times 32\times 32\)图像变量一个一维张量。
img_batch = img_t.view(-1).unsqueeze(0)
out = model(img_batch)
out
tensor([[0.4620, 0.5380]], grad_fn=<SoftmaxBackward0>)
再通过torch.max()返回该维度上最大元素以及该值出现的索引。在这里,我们需要沿着概率向量取最大值,因此维度为1:
_, index = torch.max(out, dim=1)
index
tensor([1])
虽然完全没有训练,但是意外的猜中了。
3. 分类的损失
分类损失可以按以下步骤计算:
- 运行正向传播,并从最后的线性层获取输入值。
- 计算它们的Softmax以获取概率。
- 取与目标类别对应的预测概率(参数的可能性)。在有监督学习中,我们当然知道它的类别。
- 计算它的对数的相反数(LogSoftmax函数)再添加到损失中。
现在修改模型,使用nn.LogSoftmax()作为输出模块:
model = nn.Sequential(
    nn.Linear(3072, 512),
    nn.Tanh(),
    nn.Linear(512, 2),
    nn.LogSoftmax(dim=1)
)
实例化NLL损失(负对数似然,Negative Log Likelihood)
loss = nn.NLLLoss()
损失将批次的nn.LogSoftmax()的输出作为第1个参数,将索引的张量(例子中的0和1)作为第2个参数
img, label = cifar2[0]
img_t = to_tensor(img)
out = model(img_t.view(-1).unsqueeze(0))
loss(out, torch.tensor([label]))
tensor(0.6234, grad_fn=<NllLossBackward0>)
4. 训练分类器
训练数据时,加入工具类中的DataLoader,该类有助于打乱数据和组织数据。数据加载器的工作是从数据集中采样小批量,期间可以选择不同的采样策略,在这里,是在每个迭代周期洗牌后进行均匀采样。
import torch
import torch.nn as nn
from torch import optim
from torch.utils.data import DataLoader

cifar2_ = []
to_tensor = transforms.ToTensor()
for img, label in cifar2:
    cifar2_.append((to_tensor(img), label),)

# pin_memory=True 表示启用GPU加速,num_workers=4 表示使用4个子进程来加速数据加载
train_loader = DataLoader(cifar2_, batch_size=64, pin_memory=True,
                          shuffle=True, num_workers=4, drop_last=True)

model = nn.Sequential(      # 建立模型
    nn.Linear(3072, 512),
    nn.Tanh(),
    nn.Linear(512, 2),
    nn.LogSoftmax(dim=1)
)

learning_rate = 1e-2        # 学习率
optimizer = optim.SGD(model.parameters(), lr=learning_rate)  # 使用随机梯度下降的优化器


loss_fn = nn.NLLLoss()
n_epochs = 100


for epoch in range(n_epochs):
    for i, (imgs, labels) in enumerate(train_loader):
        batch_size = imgs.shape[0]
        out = model(imgs.view(batch_size, -1))
        loss = loss_fn(out, labels)

        optimizer.zero_grad()
        loss.backward()
        optimizer.step()
    print("Epoch: %d, Loss: %f" % (epoch, float(loss)))
Epoch: 0, Loss: 0.467450
Epoch: 1, Loss: 0.442974
Epoch: 2, Loss: 0.489499
Epoch: 3, Loss: 0.501898
Epoch: 4, Loss: 0.460788
...
Epoch: 95, Loss: 0.246432
Epoch: 96, Loss: 0.342604
Epoch: 97, Loss: 0.408567
Epoch: 98, Loss: 0.384299
Epoch: 99, Loss: 0.244038
保存模型
path = "./models/birdOrPlane.pth"
torch.save(model, path)
现在,我们在独立的数据集上做测试
cifar2_val_ = []
to_tensor = transforms.ToTensor()

for img, label in cifar2_val:
    cifar2_val_.append((to_tensor(img), label),)
val_loader = DataLoader(cifar2_val_, batch_size=64, pin_memory=True,
                          shuffle=False, num_workers=4, drop_last=True)
correct = 0
total = 0
with torch.no_grad():   # 现在只关心结果,不许需要计算梯度
    for imgs, labels in val_loader:
        batch_size = imgs.shape[0]
        outputs = model(imgs.view(batch_size, -1))
        _, predicted = torch.max(outputs, dim=1)
        total += labels.shape[0]
        correct += int((predicted == labels).sum())

print("Accuracy: %f"%(correct / total))
Accuracy: 0.832661
可以看见,训练后的模型准确率还是比较可观的。
三、总结
在本次模型的构建和训练中,我们将二维图片当作一维来处理,这也直接导致了模型的参数巨多!
线性层的计算公式:\(y=w\times x+b\),\(x\)的长度为\(3072\)(\(3\times32\times32\)),\(y\)的长度为\(1024\),可知\(w\)的大小为\(1024\times3072\),\(b\)的长度为\(102 4\),因此参数大小为\(1024\times3072+1024=3,146,752\)
试想,如果是更大的图片,参数的数量恐怕会增加地更离谱!
因此,对于图像,需要学习利用图像数据的二维特征来获取更好的结果!
参考文献
[1]Eli Stevens. Deep Learning with Pytorch[M]. 1. 人民邮电出版社, 2022.02 :144-163.