好家伙,
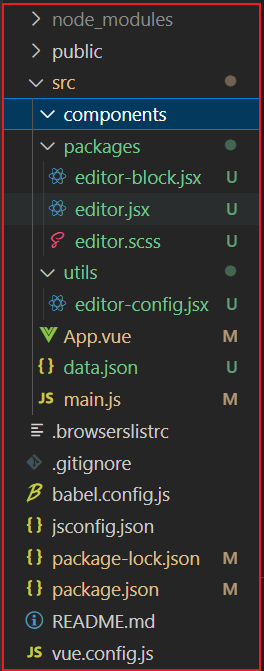
项目目录如下: 该项目使用Vue3, Element-plus
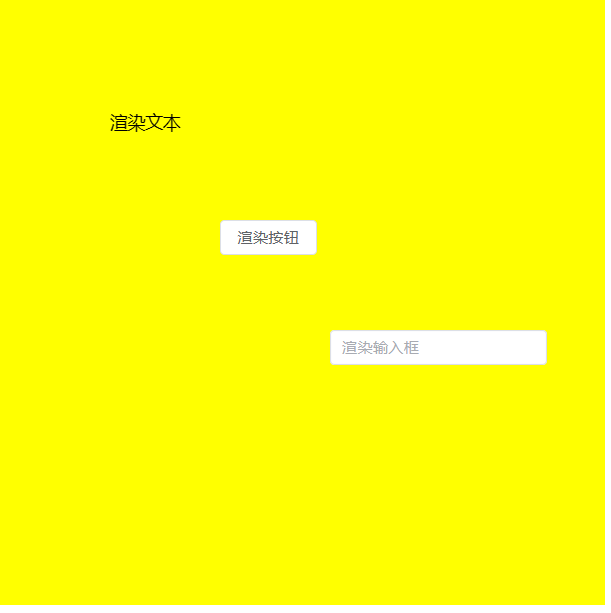
效果图如下:

开搞:
1.写出简单界面
App.vue
<template>
  <div class="app">
    <Editor v-model="state"></Editor>
  </div>
</template>

<script>
import { ref, provide } from 'vue';
import data from './data.json'
import Editor from './packages/editor'
import { registerConfig as config } from './utils/editor-config'
export default {
  components: {
    Editor
  },
  setup() {
    const state = ref(data);
    console.log(config)
    provide('config', config);

    return {
      state
    }
  }

}
</script>

<style lang="scss">
.app {
  position: fixed;
  top: 20px;
  left: 20px;
  right: 20px;
  bottom: 20px;
}
</style>
editor.jsx
import { computed, defineComponent,inject } from "vue";
import './editor.scss'
import EditorBlock from "./editor-block";
export default defineComponent({
    props: {
        modelValue: { type: Object }
    },
    setup(props) {
        const data = computed({
            get() {
                return props.modelValue
            }
        })
        console.log(data.value)

        const containerStyles = computed(() => ({
            width: data.value.container.width + 'px',
            height: data.value.container.height + 'px'
        }))

        const config= inject('config')

        return () => <div>
            <div class="editor-left">
                {/* 根据注册列表 渲染对应的内容 */}
                {config.componentList.map(component=>(
                    <div class="editor-left-item">
                        <span>{component.label}</span>
                        <div>{component.preview()}</div>

                    </div>
                ))}
            </div>

            <div class="editor-top">菜单栏</div>
            <div class="editor-right">属性控制栏目</div>
            <div class="editor-container">
                <div class="editor-container-canvas">
                    {/* 产生内容 */}
                    <div class="editor-container-canvas__content" style={containerStyles.value}>
                        {
                            (data.value.blocks.map(block=>(
                                <EditorBlock block={block}></EditorBlock>
                            )))
                        }
                    </div>
                </div>
            </div>

        </div>
    }
})
editor.scss
.editor {
    width: 100%;
    height: 100%;

    &-left,
    &-right {
        position: absolute;
        width: 270px;
        background: red;
        top: 0;
        bottom: 0;
    }

    &-left {
        left: 0;
        &-item{
            width:200px;
            margin:20px auto;
            display: flex;
            justify-content:center;
            align-items: center;
            background: #fff;
            padding:20px;
            cursor:move;
            user-select: none;
            min-height: 80px;
            position: relative;
            > span{
                position: absolute;
                top:0;
                left:0;
                background: rgb(96, 205, 224);
                color:#fff;
                padding:4px;
            }
            &::after{
                content: '';
                position: absolute;
                top:0;
                left:0;
                right:0;
                bottom:0;
                background: #ccc;
                opacity:0.2 ;
            }
        }
    }

    &-right {
        right: 0
    }

    &-top {
        position: absolute;
        right: 280px;
        left: 280px;
        height: 80px;
        background: blue;
    }

    &-container {
        padding: 80px 270px 0;
        height: 100%;
        box-sizing: border-box;

        &-canvas {
            overflow: scroll;
            height: 100%;

            &__content {
                margin: 20px auto;
                width: 9999px;
                height: 10000px;
                background: yellow;
                position: relative;
            }
        }
    }
}

.editor-block{
    position: absolute;
}
2.构造假数据 实现根据位置渲染内容
我们随便写一些假数据
data.json
{
    "container":{
        "width":"550",
        "height":"550"

    },
    "blocks":[
        {"top":100,"left":100,"zIndex":1,"key":"text"},
        {"top":200,"left":200,"zIndex":1,"key":"button"},
        {"top":300,"left":300,"zIndex":1,"key":"input"}
    ]
}
现在我要实现的效果是,
我的容器大小能够变为以上data.json中"container"的大小,并能够将"blocks"中的三个组件渲染到容器中
创建工具类,为组件进行注册
editor-config.jsx
//列表去可以显示所有的物料
//key对应的组件映射关系
import {ElButton,ElInput} from 'element-plus'

function createEditorConfig(){
    const componentList =[];
    const componentMap ={}

    return{
        componentList,
        componentMap,
        register:(component)=>{
            componentList.push(component);
            componentMap[component.key] = component
        }
    }
}
export let registerConfig = createEditorConfig();
registerConfig.register({
    label:'文本',
    preview:()=>'预览文本',
    render:()=>'渲染文本',
    key:'text'
});
registerConfig.register({
    label:'按钮',
    preview:()=><ElButton>预览按钮</ElButton>,
    render:()=><ElButton>渲染按钮</ElButton>,
    key:'button'
});
registerConfig.register({
    label:'输入框',
    preview:()=><ElInput placeholder='预览输入框'>预览按钮</ElInput>,
    render:()=><ElInput placeholder='渲染输入框'>预览按钮</ElInput>,
    key:'input'
});
console.log(registerConfig)

此处preview属性用于预览组件,render属性用于渲染组件
在App.vue中数据传输
<Editor v-model="state"></Editor>
/.
 .
 .
 ./
import data from './data.json'
import { registerConfig as config } from './utils/editor-config'
export default {
  components: {
    Editor
  },
  setup() {
    const state = ref(data);
    console.log(config)
    provide('config', config);

    return {
      state
    }
  }
}
再次来到editor.jsx中
props: {
modelValue: { type: Object }
},
setup(props) {
        const data = computed({
            get() {
                return props.modelValue
            }
        })
        console.log(data.value)

        const containerStyles = computed(() => ({
            width: data.value.container.width + 'px',
            height: data.value.container.height + 'px'
        }))
<div class="editor-container-canvas__content" style={containerStyles.value}>
通过样式绑定,完成从.json到样式的修改
3.渲染组件列表
配置组件对应的映射关系 {preview:xxx,render:xxx}后
在editor.jsx中
const config= inject('config')
return () => <div>
            <div class="editor-left">
                {/* 根据注册列表 渲染对应的内容 */}
                {config.componentList.map(component=>(
                    <div class="editor-left-item">
                        <span>{component.label}</span>
                        <div>{component.preview()}</div>

                    </div>
                ))}
            </div>

4.渲染组件
editor.jsx
<div class="editor-container-canvas__content" style={containerStyles.value}>
                        {
                            (data.value.blocks.map(block=>(
                                <EditorBlock block={block}></EditorBlock>
                            )))
                        }
                    </div>
editor-block.jsx
import { computed, defineComponent, inject } from "vue";

export default defineComponent({
    props: {
        block: { type: Object }
    },
    setup(props) {
        const blockStyles = computed(() => ({
            top: `${props.block.top}px`,
            left: `${props.block.left}px`,
            zIndex: `${props.block.zIndex}px`,

        }))
        const config = inject('config')
        console.log(config)
        return () => {
            const component = config.componentMap[props.block.key];
            const RenderComponent = component.render()
            return <div class="editor-block" style={blockStyles.value}>
                {RenderComponent}
            </div>
        }
    }
})