python-Gradio
Gradio是一个开源的Python库,用于构建机器学习和数据科学演示应用。有了Gradio,你可以围绕你的机器学习模型或数据科学工作流程快速创建一个简单漂亮的用户界面。Gradio适用于以下情况:
- 为客户/合作者/用户/学生演示你的机器学习模型。
- 通过自动共享链接快速部署你的模型,并获得对模型性能的反馈。
- 在开发过程中使用内置的操作和解释工具交互式地调试你的模型。
1、简单案例
通过Interface类可以快速构建应用。
输入文字
import gradio as gr

def inferfunc(name):
    return "Hello " + name + "!"

demo = gr.Interface(fn=inferfunc,
                    inputs=gr.Text(lines=3, placeholder="input Here...", label="input txt"),
                    outputs=gr.Text(lines=2, placeholder="output Here...", label="output txt"),
                    )
demo.launch(
    share=False,
    server_name='127.0.0.1',
    server_port=7788
)
运行程序后,打开http://127.0.0.1:7788即可看到网页效果。左边是文本输入框,右边是结果展示框。

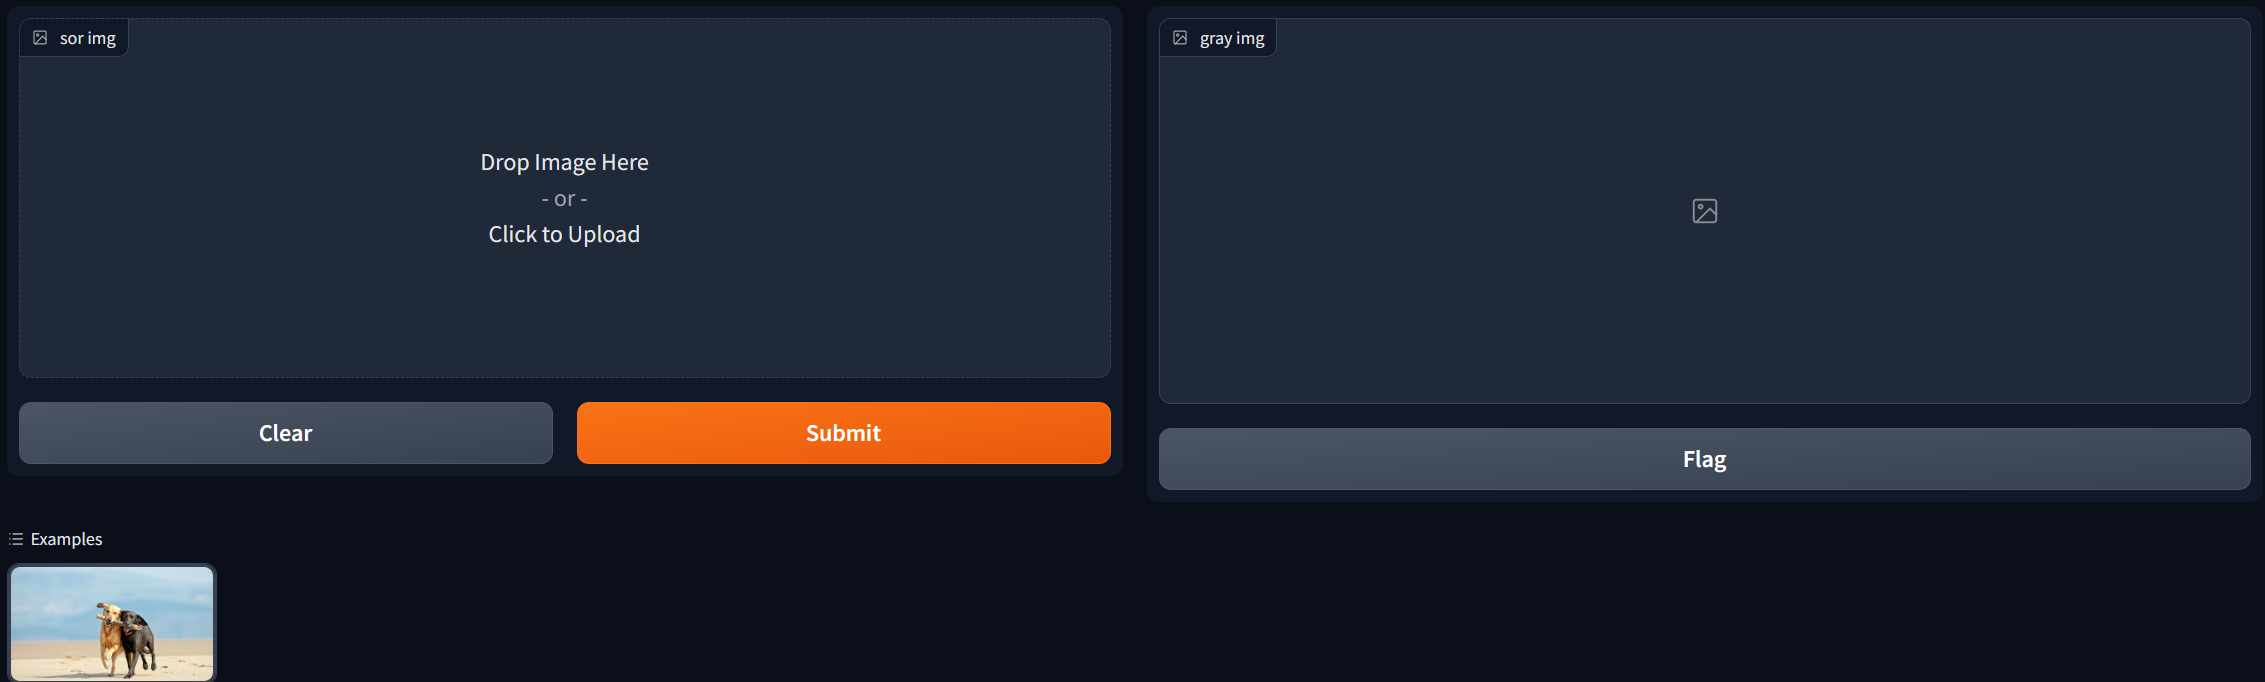
输入图像-并加载默认图像
Gradio支持许多类型的组件,如image、dataframe、video
def to_black(image):
    output = cv2.cvtColor(image, cv2.COLOR_BGR2GRAY)
    return output


interface = gr.Interface(fn=to_black,
                         inputs=gr.Image(label="sor img"),
                         outputs=gr.Image(label="gray img"),
                         examples= ["assets/demo4.jpg"],
                         )

interface.launch(server_name='127.0.0.1', server_port=7788)
- fn: 围绕用户界面的函数
- 输入:用于输入的组件(例如:“text”、"image)。
- 输出:用于输出的组件(例如:“text”、"image)。
当使用Image组件作为输入时,函数将接收一个具有 shape=(w、h、3)的NumPy数组,其中最后一个维度表示RGB值。我们还将以NumPy数组的形式返回一个图像
您还可以使用type=关键字参数设置组件使用的数据类型。例如,如果希望函数采用图像的文件路径
gr.Image(type="filepath", shape=...)
多输入输出组件设置
import gradio as gr

def greet(programmer, is_work, overtime):
    salutation = "Good morning" if is_work else "Good evening"

    greeting = f"{salutation} {programmer}, overtime is {overtime}"
    celsius = (overtime-10) * 5
    return greeting, round(celsius, 2)


demo = gr.Interface(
    fn=greet,
    inputs=["text", "checkbox", gr.Slider(0, 100,label="加班时间")],
    outputs=["text", "number"],
)
demo.launch()

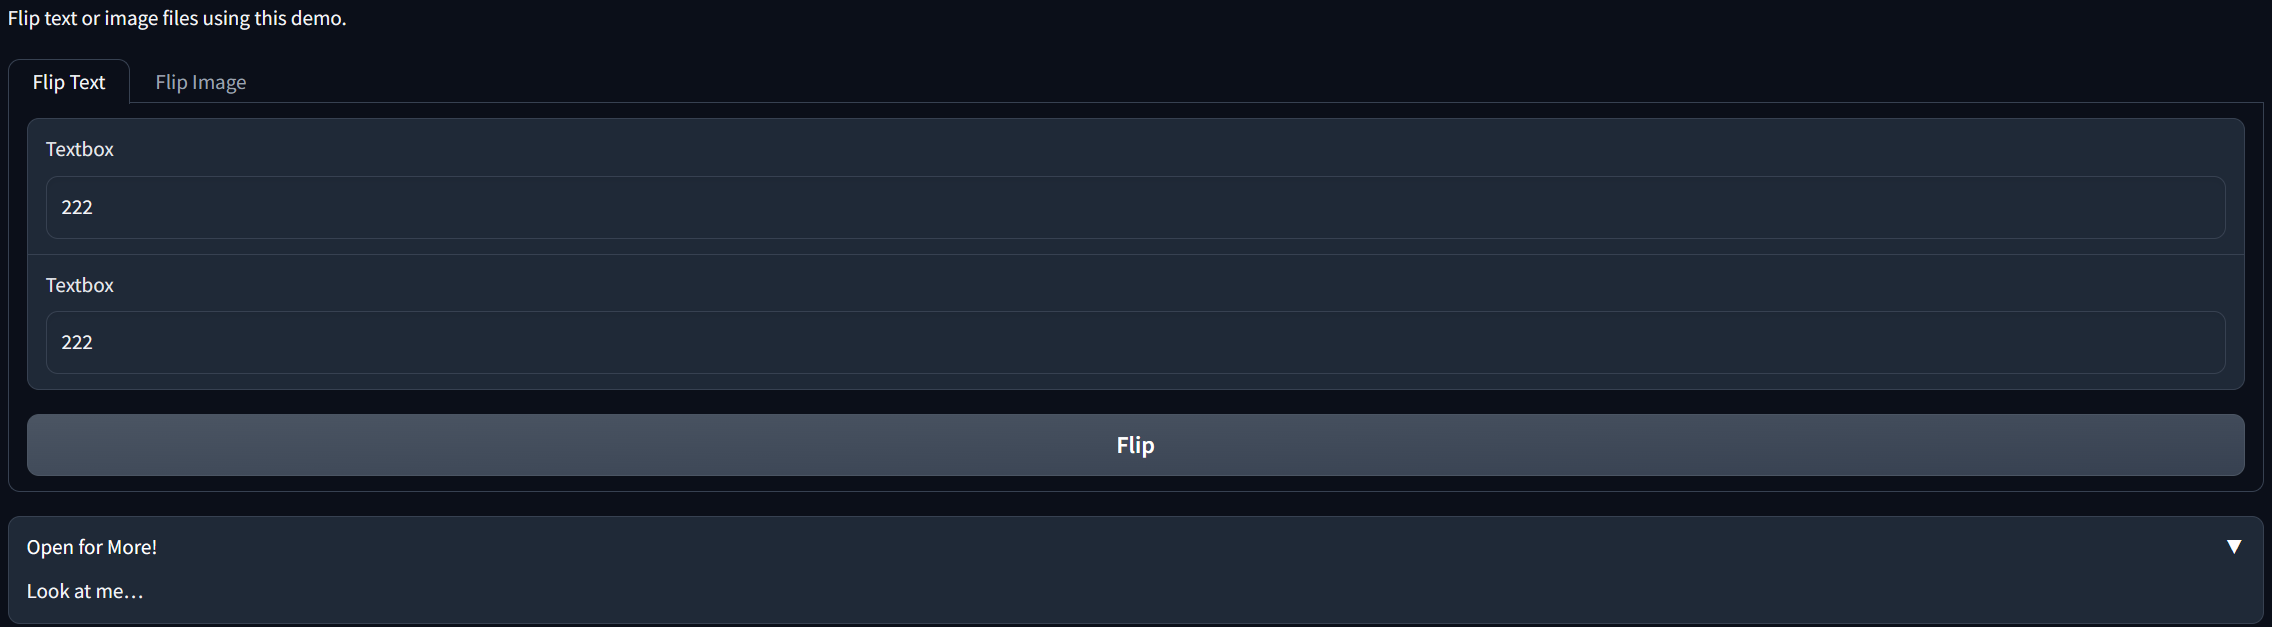
2、Blocks构建应用
相比Interface,Blocks提供了一个低级别的API,用于设计具有更灵活布局和数据流的网络应用。Blocks允许控制组件在页面上出现的位置,处理复杂的数据流
Blocks方式需要with语句添加组件
import numpy as np
import gradio as gr


def flip_text(x):
    return x[::-1]


def flip_image(x):
    return np.fliplr(x)


with gr.Blocks() as demo:
    # 用markdown语法编辑输出一段话
    gr.Markdown("Flip text or image files using this demo.")
    # 设置tab选项卡
    with gr.Tab("Flip Text"):
        #  Blocks特有组件,设置所有子组件按垂直排列
        # 垂直排列是默认情况,不加也没关系
        with gr.Column():
            text_input = gr.Textbox()
            text_output = gr.Textbox()
        text_button = gr.Button("Flip")
    with gr.Tab("Flip Image"):
        # Blocks特有组件,设置所有子组件按水平排列
        with gr.Row():
            image_input = gr.Image()
            image_output = gr.Image()
        image_button = gr.Button("Flip")

    # 设置折叠内容
    with gr.Accordion("Open for More!"):
        gr.Markdown("Look at me...")

    text_button.click(flip_text, inputs=text_input, outputs=text_output)
    image_button.click(flip_image, inputs=image_input, outputs=image_output)

demo.launch()
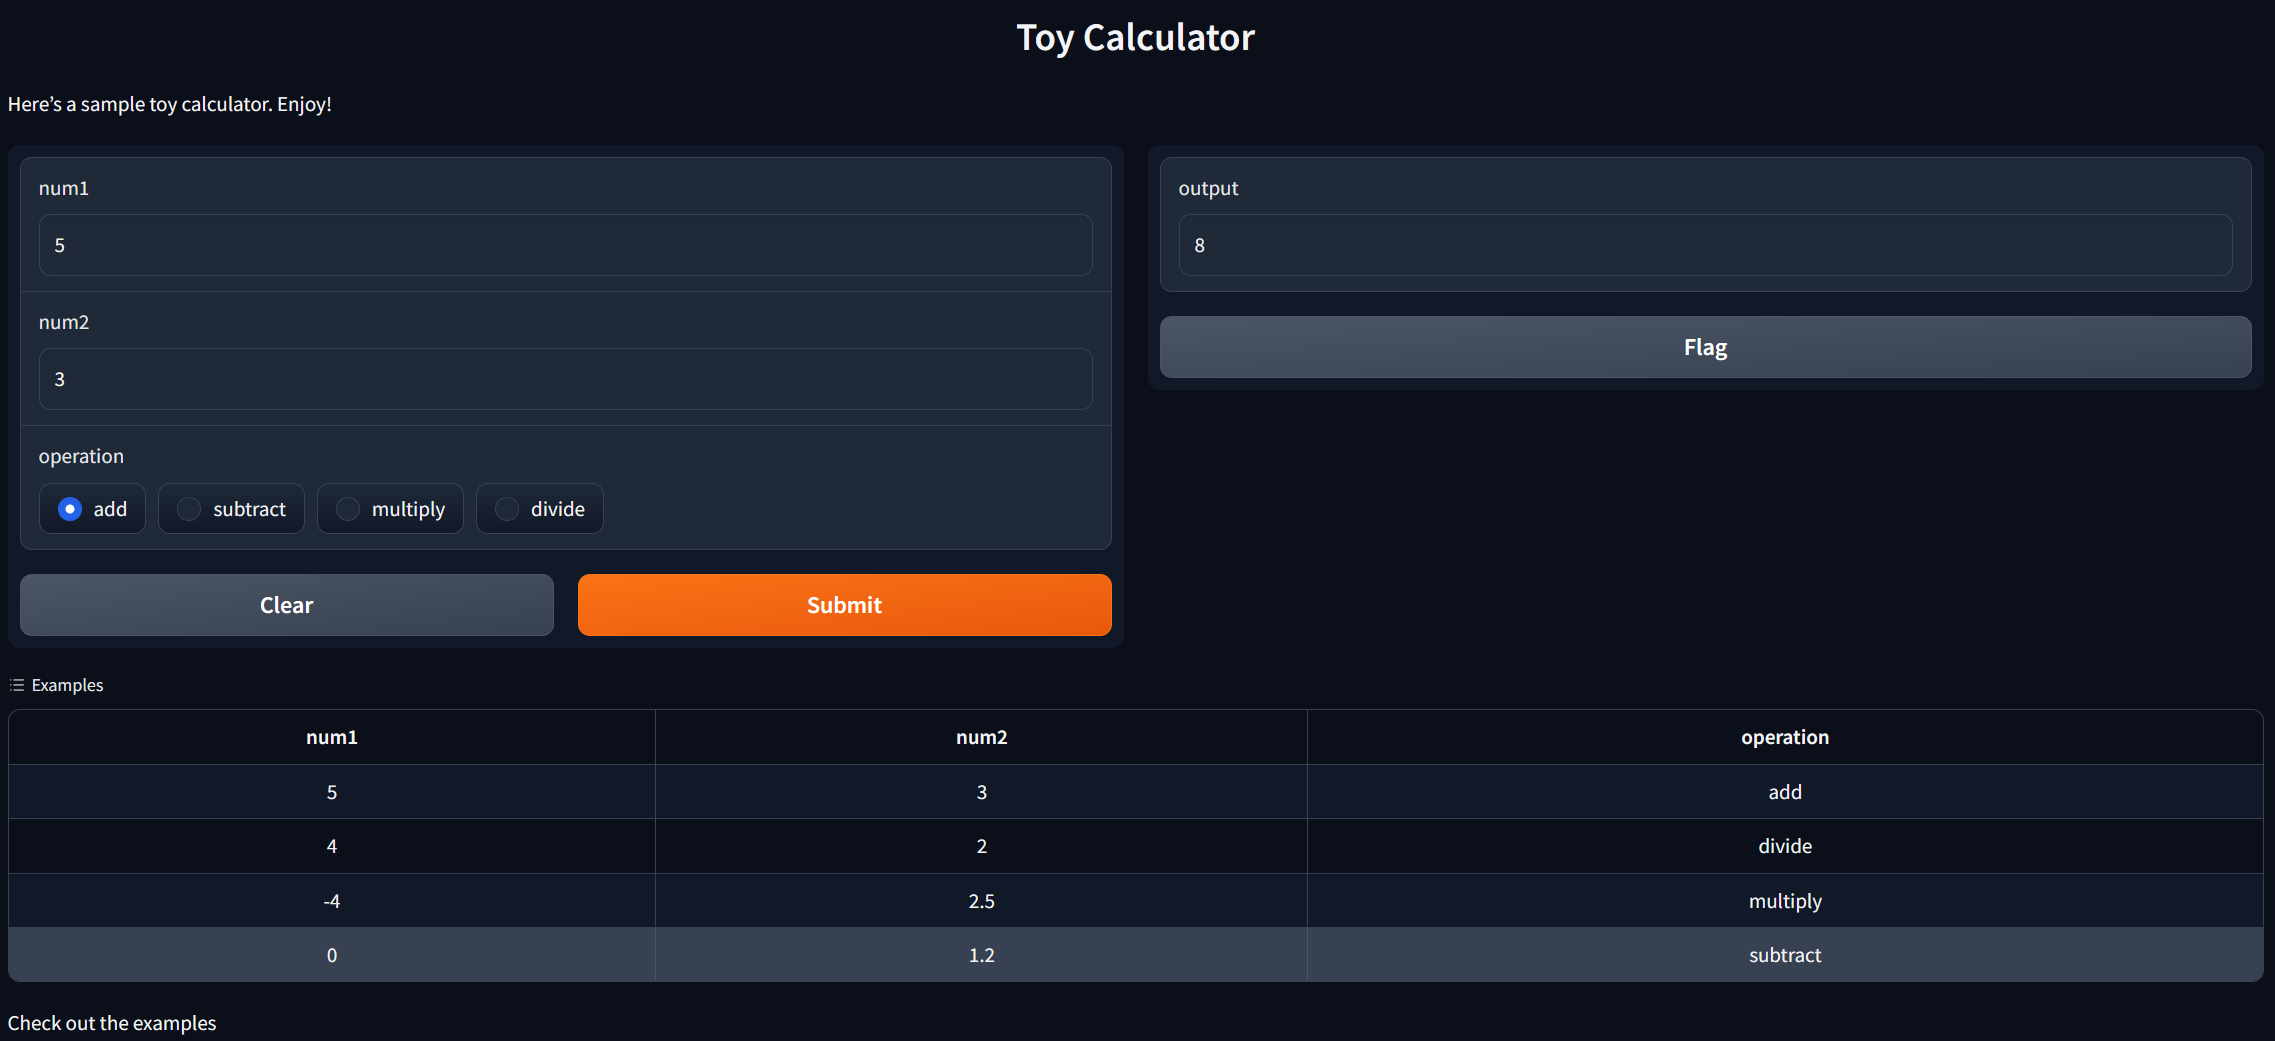
3、关键特性
import gradio as gr

# 一个简单计算器
def calculator(num1, num2, operation):
    if operation == "add":
        return num1 + num2
    elif operation == "subtract":
        return num1 - num2
    elif operation == "multiply":
        return num1 * num2
    elif operation == "divide":
        if num2 == 0:
            # 设置报错弹窗
            raise gr.Error("Cannot divide by zero!")
        return num1 / num2


demo = gr.Interface(
    fn=calculator,
    inputs=[
        "number",
        "number",
        gr.Radio(["add", "subtract", "multiply", "divide"]),
    ],
    outputs="number",
    examples=[
        [5, 3, "add"],
        [4, 2, "divide"],
        [-4, 2.5, "multiply"],
        [0, 1.2, "subtract"],
    ],
    # 设置网页标题
    title="Toy Calculator",
    # 左上角的描述文字
    description="Here's a sample toy calculator. Enjoy!",
    # 左下角的文字
    article="Check out the examples",
)
demo.launch()
4、样式和队列
如果函数推理时间较长,比如目标检测;或者应用程序处理流量过大,则需要使用queue方法进行排队。
demo = gr.Interface(...).queue()
demo.launch()

# 或
with gr.Blocks() as demo:
    #...
demo.queue()
demo.launch()
采用yield 嵌入 生成器
import gradio as gr
import numpy as np
import time

# 生成steps张图片,每隔1秒钟返回
def fake_diffusion(steps):
    for _ in range(steps):
        time.sleep(1)
        image = np.random.randint(255, size=(300, 600, 3))
        yield image

demo = gr.Interface(fake_diffusion,
                    # 设置滑窗,最小值为1,最大值为10,初始值为3,每次改动增减1位
                    inputs=gr.Slider(1, 10, value=3, step=1),
                    outputs="image")

# 生成器必须要queue函数
demo.queue()

demo.launch()
5、进度条
Gradio支持创建自定义进度条的功能,这样您就可以自定义并控制向用户显示的进度更新。为了启用此功能,只需在方法中添加一个默认值为gr.Progress实例的参数。然后,您可以通过使用0到1之间的浮点值直接调用此实例来更新进度级别,或者使用progress实例的tqdm()方法来跟踪可迭代的进度
import gradio as gr
import time

def slowly_reverse(word, progress=gr.Progress()):
    progress(0, desc="Starting")
    time.sleep(1)
    progress(0.05)
    new_string = ""
    for letter in progress.tqdm(word, desc="Reversing"):
        time.sleep(0.25)
        new_string = letter + new_string
    return new_string

demo = gr.Interface(slowly_reverse, gr.Text(), gr.Text())

if __name__ == "__main__":
    demo.queue(concurrency_count=10).launch()
6、事件和监听
事件链接
import gradio as gr

def greet(name):
    return "Hello " + name + "!"

with gr.Blocks() as demo:

    with gr.Row():
        name = gr.Textbox(label="Name")
        output = gr.Textbox(label="Output Box")
    greet_btn = gr.Button("Greet")
    greet_btn.click(fn=greet, inputs=name, outputs=output, api_name="greet")

demo.launch()
为输入组件添加change事件
import gradio as gr

def welcome(name):
    return f"Welcome to Gradio, {name}!"

with gr.Blocks() as demo:
    gr.Markdown(
    """
    # Hello World!
    Start typing below to see the output.
    """)
    inp = gr.Textbox(placeholder="What is your name?")
    out = gr.Textbox()
    # 设置change事件
    inp.change(fn = welcome, inputs = inp, outputs = out)

demo.launch()