早期大家都使用 netflix 公司的 Hystrix 组件,通过编写代码实现对微服务接口的限流、熔断、隔离等保护措施,由于 Hystrix 组件不再更新迭代,逐渐被大家抛弃。当前大家基本上都使用阿里的 Sentinel 技术实现对微服务接口的访问监控和保护,其最大的优点就在于基本上不需要编代码,只需要通过图形化界面进行配置,就可以实现对微服务接口的监控和保护,实在是太方便了。
Sentinel 默认情况下,配置的规则都是存储在微服务的内存中,一旦微服务重启,配置的规则就会丢失。我们常用的微服务保护规则主要是限流规则,本篇博客主要采用官方已经实现的代码,实现 Nacos 作为限流规则的存储。也就是说通过 Sentinel 的 Dashboard 界面配置限流规则,将限流规则存储到 Nacos 中,相应的微服务从 Nacos 中读取限流规则。这样无论 Nacos 重启以及微服务重启,所设置的流控规则都不会丢失。
Sentinel 的官网地址:https://sentinelguard.io/zh-cn/index.html
一、下载源码
Sentinel 的源码下载地址为:https://github.com/alibaba/Sentinel/releases
如果你的 GitHub 网站打不开,建议你下载 Watt Toolkit 加速器,非常好用。
Watt Toolkit 加速器的下载地址为:https://steampp.net/download
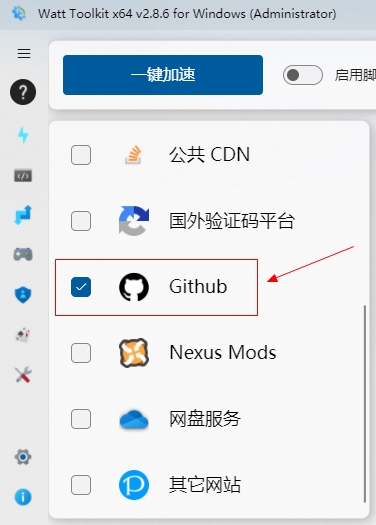
只要在加速器上,勾选 GitHub 然后点击【一键加速】,你就可以在任何时候轻松打开 GitHub,非常好用。
访问 Sentinel 的 GitHub 网站,目前我能够看到的最新稳定版本是 1.8.6,如下所示:
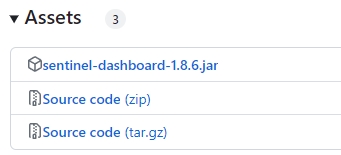
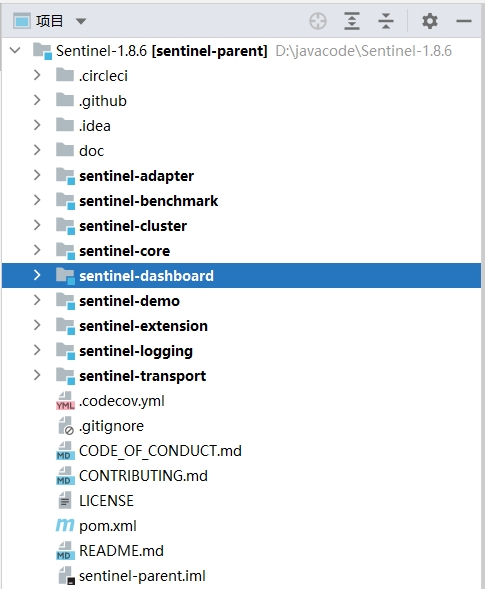
Sentinel-dashboard-1.8.6.jar 是官网打包好的 jar 包,仅支持规则存储在内存中。我们需要下载的是 zip 源码包,然后进行解压缩,使用 IDEA 进行打开就能看到 Sentinel 的源代码,我们需要修改的是 sentinel-dashboard 模块的源码,如下图所示:
二、修改源码
打开 sentinel-dashboard 模块的 pom 文件,找到 sentinel-datasource-nacos 依赖包:
<dependency>
    <groupId>com.alibaba.csp</groupId>
    <artifactId>sentinel-datasource-nacos</artifactId>
    <!--<scope>test</scope>-->
</dependency>
默认情况下,其 scope 是 test,删掉或者注释掉 scope 配置,如上所示。
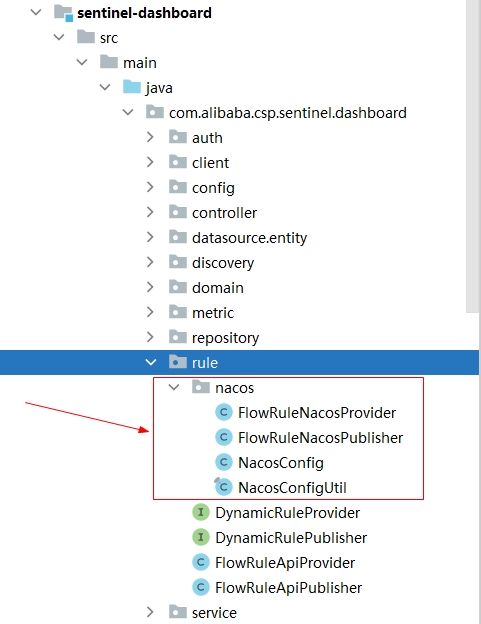
在 sentinel-dashboard 的 test 下面 rule 包下,官方已经编写了 nacos、apollo 等对限流规则持久化存储的支持。
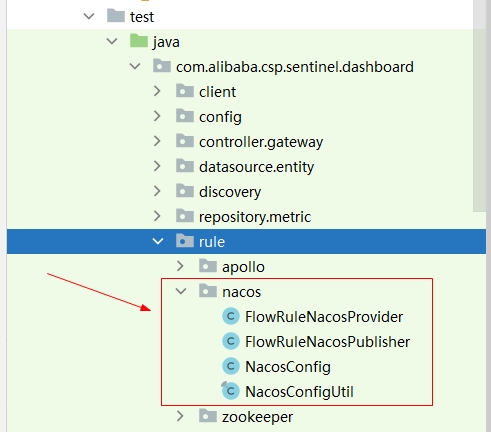
我们使用的是 Nacos 进行持久化存储,因此我们只需要把 nacos 包下的内容,拷贝到 main 下的 rule 包下即可,如下图所示:
然后打开 NacosConfig 类,将其内容修改成如下结果:
package com.alibaba.csp.sentinel.dashboard.rule.nacos;

import com.alibaba.csp.sentinel.dashboard.datasource.entity.rule.FlowRuleEntity;
import com.alibaba.csp.sentinel.datasource.Converter;
import com.alibaba.fastjson.JSON;
import com.alibaba.nacos.api.config.ConfigFactory;
import com.alibaba.nacos.api.config.ConfigService;
import org.springframework.beans.factory.annotation.Value;
import org.springframework.boot.context.properties.ConfigurationProperties;
import org.springframework.context.annotation.Bean;
import org.springframework.context.annotation.Configuration;
import java.util.List;

@Configuration
public class NacosConfig {

    //配置的 nacos 地址,如果配置文件没有找到配置,则使用默认的localhost
    @Value("${nacos.addr:localhost}")
    private String addr;

    @Bean
    public Converter<List<FlowRuleEntity>, String> flowRuleEntityEncoder() {
        return JSON::toJSONString;
    }

    @Bean
    public Converter<String, List<FlowRuleEntity>> flowRuleEntityDecoder() {
        return s -> JSON.parseArray(s, FlowRuleEntity.class);
    }

    @Bean
    public ConfigService nacosConfigService() throws Exception {
        return ConfigFactory.createConfigService(addr);
    }
}
我们使用 addr 私有变量,从配置文件中读取 nacos.addr 配置内容(该配置内容需要配置 nacos 的连接地址),如果配置文件中没有找到 nacos.addr 配置节,则使用默认的 localhost 内容作为配置值。当然你也可以在 application.properties 文件中增加上 nacos.addr 配置内容。其实加不加都无所谓,因为我们在 addr 使用配置表达式中指定的有默认值。
在 application.properties 文件中,你可以发现:
- Sentinel Dashboard 服务没有端口配置,因此服务启动后使用的就是 SpringBoot 默认的 8080 端口
- Sentinel Dashboard 中 auth.username 和 auth.password 都是 sentinel ,这里配置的是登录的用户名和密码
然后打开 controller 下面 v2 包下面的 FlowControllerV2 类,如下图所示:

将 ruleProvider 变量上面的 @Qualifier 值修改为 flowRuleNacosProvider
将 rulePublisher 变量上面的 @Qualifier 值修改为 flowRuleNacosPublisher
@Autowired
@Qualifier("flowRuleNacosProvider")
private DynamicRuleProvider<List<FlowRuleEntity>> ruleProvider;

@Autowired
@Qualifier("flowRuleNacosPublisher")
private DynamicRulePublisher<List<FlowRuleEntity>> rulePublisher;
最后打开 webapp 下的 sidebar.html 静态页面,如下图所示:

找到如下注释内容:
<!--<li ui-sref-active="active" ng-if="entry.appType==0">
<a ui-sref="dashboard.flow({app: entry.app})">
<i class="glyphicon glyphicon-filter"></i> 流控规则-V1</a>
</li>-->
取消注释,为了区分普通的流控规则菜单,此处可以修改一下菜单的名称,如下所示:
<li ui-sref-active="active" ng-if="entry.appType==0">
<a ui-sref="dashboard.flow({app: entry.app})">
<i class="glyphicon glyphicon-filter"></i> 流控规则Nacos</a>
</li>
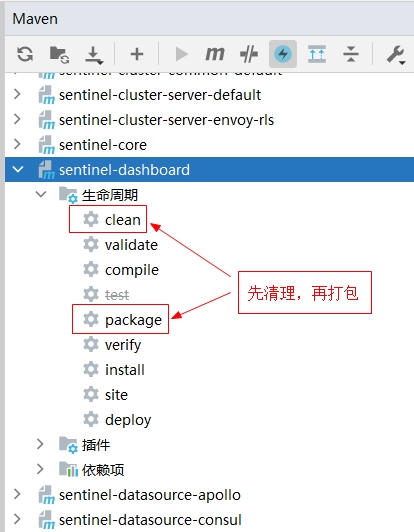
OK,经过以上步骤,就完成了修改,我们对 sentinel-dashboard 模块进行清理并打包
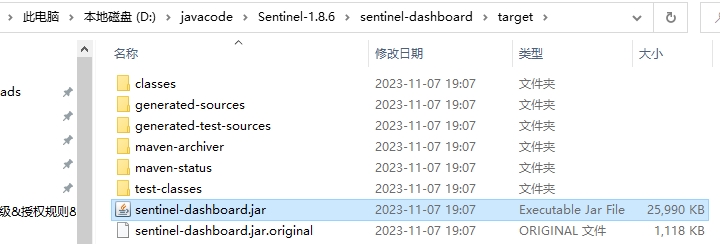
然后在 sentinel-dashboard 模块的 targart 目录下,就能够找到打包好的最新 jar 包:
三、部署 Sentinel 包
我将打包好的最新 sentinel-dashboard.jar 部署到虚拟机上,方便后续使用。
我的虚拟机是 CentOS7(ip 地址是 192.168.136.128),并且已经部署好了单机版的 nacos(有关 nacos 的部署,可以参考我之前的博客),nacos 的访问地址是 http://192.168.136.128:8848/nacos,当然这里部署的 nacos 是不需要验证用户名和密码的。
我创建一个目录 mkdir -p /app/sentinel ,把 jar 包上传到这个目录中。
在 /etc/systemd/system 下,新建一个 sentinel.service 文件,内容填写如下:
[Unit]
Description=sentinel
After=syslog.target network.target

[Service]
Type=simple

#注意:ExecStart 后面的命令脚本都是写在一行中,没有手动进行换行,只是横向空间不够,自动换行了
ExecStart=/app/jdk1.8/bin/java -jar -Dnacos.addr=192.168.136.128:8848 /app/sentinel/sentinel-dashboard.jar
ExecStop=/bin/kill -15 $MAINPID

User=root
Group=root

[Install]
WantedBy=multi-user.target
注意:由于我的 jdk 安装路径在 /app/jdk1.8 中,所以 java 命令在 /app/jdk1.8/bin 目录下,你可以根据自己的 jdk 安装路径进行调整。另外在启动 sentinel-dashboard.jar 时,可以通过 -D 指定参数,这里使用 -Dnacos.addr=192.168.136.128:8848 指定了 nacos 的连接地址,当然你也可以通过 -D 指定 sentinel dashboard 界面登录的用户名和密码,如 -Dauth.username=xxx 和 -Dauth.password=xxx(注意 -D 和参数之间没有空格)
然后运行一下命令,启动服务,以及将服务设置为开机自动启动,服务名称就是文件名称,其中 .service 可以省略。
# 修改了服务文件后,需要执行此命令
systemctl daemon-reload

# 启动服务
# 服务的名称,就是文件的名称,因为新建的文件名称是 sentinel.service
# 服务的名称中 .service 可以省略
systemctl start sentinel

# 将服务设置为开机自动启动
systemctl enable sentinel
最后访问 http://192.168.138.128:8080 即可看到 sentinel dashboard 的登录页面:
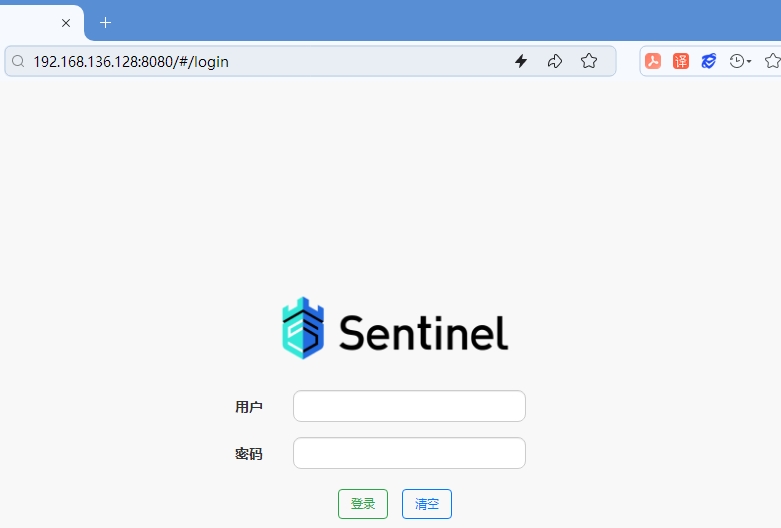
使用默认的用户名和密码,都是 sentinel 登录进去:
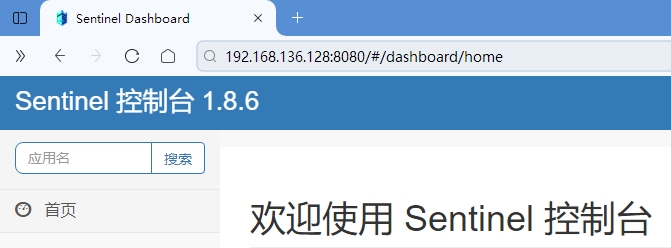
在没有监控微服务接口的情况下,登录进入什么都没有。
我提前开发好了一个 Demo ,配置了使用 sentinel 进行监控请求,效果如下所示:
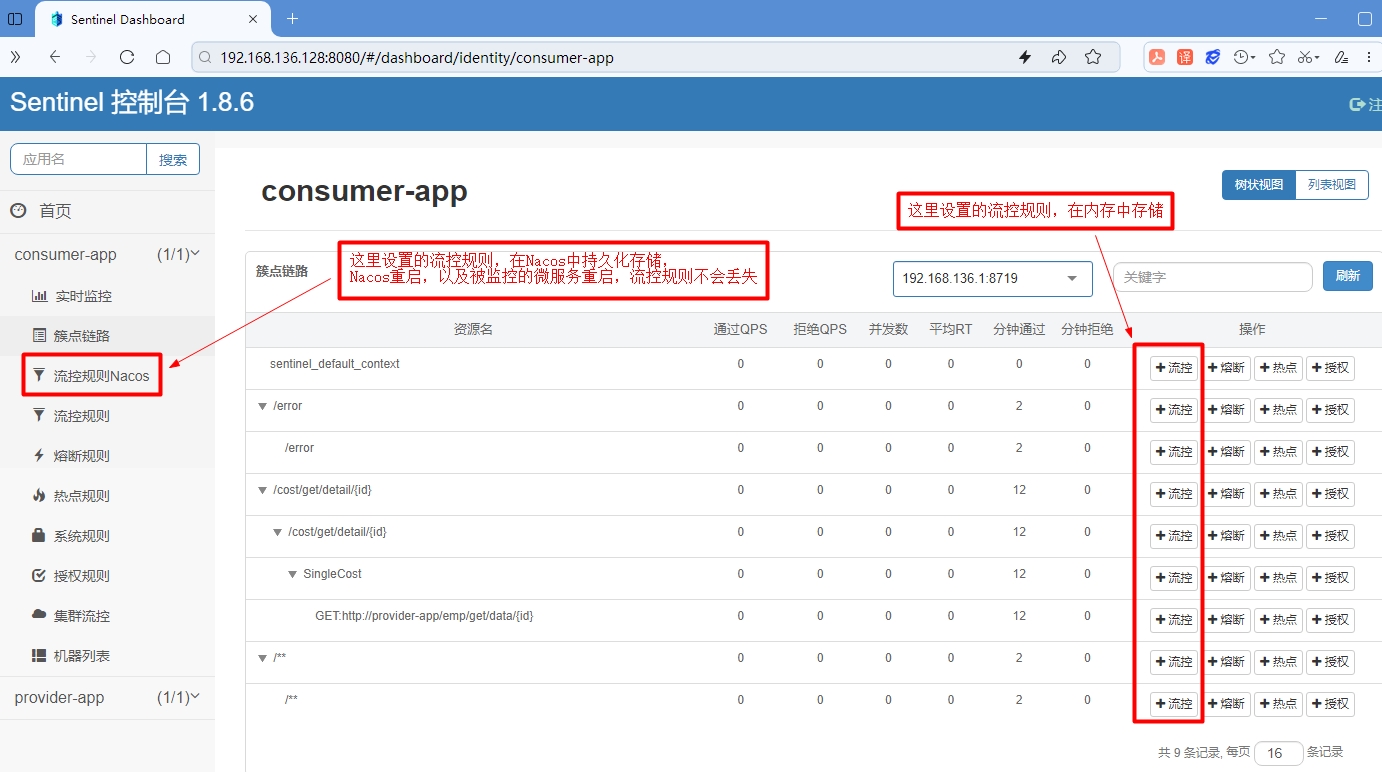
可以看到左侧菜单中,出现了被监控的微服务:consumer-app 和 provider-app
每个微服务中,都有我们修改源码后的菜单:流控规则Nacos,在该菜单中设置的流控规则,会持久化存储到 Nacos 中,Nacos 重启以及被监控的微服务重启都不会丢失。直接在每个请求后面的流控按钮中设置的流控规则,存储被监控的微服务内存中,微服务重启后会丢失。
对于微服务来说,要想被 sentinel 监控请求,以及将设置的流控规则,存储到 Nacos 中,需要引入下面的依赖包:
<!--引入 sentinel 依赖包-->
<dependency>
    <groupId>com.alibaba.cloud</groupId>
    <artifactId>spring-cloud-starter-alibaba-sentinel</artifactId>
</dependency>
<!--使用官方的示例代码改造的 sentinel 可将限流配置保存到 nacos 中,
    引入该依赖包,可以是微服务从 nacos 中读取限流配置-->
<dependency>
    <groupId>com.alibaba.csp</groupId>
    <artifactId>sentinel-datasource-nacos</artifactId>
</dependency>
以 consumer-app 微服务来说,还需要在 application.yml 中配置如下内容:
spring:
  application:
    name: consumer-app
  cloud:
    nacos:
      server-addr: 192.168.136.128:8848
    sentinel:
      transport:
        dashboard: 192.168.136.128:8080
      datasource:
        flow:
          nacos:
            server-addr: 192.168.136.128:8848
            dataId: consumer-app-flow-rules
            groupId: sentinel-group
            rule-type: flow
      # Sentinel 默认会对资源请求链路进行整合,这样会导致流控模式中的链路模式无法使用
      # 因此需要关闭 context 整合,这样 sentinel 监控界面会单独展示出每种链路请求路径
      web-context-unify: false

feign:
  sentinel:
    # 开启 feign 对 sentinel 的支持,允许 sentinel 监控 feign 的调用请求
    enabled: true
这里先把 Demo 的源代码提供出来,由于篇幅有限,下篇博客再详细介绍 Demo 源代码实现的功能:
源代码下载地址为:https://files.cnblogs.com/files/blogs/699532/springcloud_sentinel.zip